Saturday, February 7, 2015

Free Pattern: Winter Blues


But this would make very happy in blue!


http://www.ravelry.com/patterns/library/wrap-sody-in-blue-blanket-coat
For some reason I can't seem to download the pattern, hopefully you will have better luck


Leave you with some winter magic!
 
Until we meet again,
Claudia


Free Pattern: Center Heart Square

© Jarrellj

Center Heart Square
 12 inch square
by Ginger Badger
Copyright January 2002
Materials  Worsted Weight Yarn
1 skein of red or color of choice
1 skein of white or color of choice
1 skein of navy or color of choice
Tapestry needle
H hook or size needed for gauge

Important Note:  Please read pattern all the way through before starting.

Instructions:


With Red, ch 4; join with slip st to form a ring.
Rnd 1 (right side): Ch 1, 14 sc in ring: join with slip st to first sc. 
Rnd 2: Ch 4, 2 tr in each of next 2 sc, 2 dc in each of next 2 sc, 2 hdc in each of next 2 sc, ch 1, tr in next sc, ch 1, 2 hdc in each of next 2 sc, 2 dc in each of next 2 sc, 2 tr in each of next 2 sc, ch 4, slip st in sc at base of beginning ch 4: 26 sts and 10 chs.

Rnd 3: Ch 1, working around first slip st, sc in same st as slip st, working in BLO, sc in next 4 chs, sc in next 12 sts and in next ch, 3 sc in next tr, sc in next ch, sc in next 12 sts and in next 4 chs; join with slip st to both loops of first sc: 38 sc.

Rnd 4: Working in both loops, slip st in next 2 sc, ch 1, sc in same st and in next  2 sc, 2 sc in each of next 6 sc, sc in next 8 sc, 3 sc in next sc, sc in next 8 sc, 2 sc in each of next 6 sc, sc in next 3 sc, leave remaining sts unworked; join with slip st to first sc, 
finish off red. 49 sc.

Rnd 5: With right side facing join white with a sc in same st as joining; * ch 3, skip next sc, sc in next sc; repeat from * around; join with slip st to first sc: 25 sc and 24 ch 3 spaces.

Rnd 6: Slip st in first ch-3 sp, ch 1, sc in same space, (ch 3, sc in next ch-3 sp) around, dc in first sc to form last ch-3 sp.

Rnd 7: Ch 1, 3 sc in same sp, 3 hdc in next ch-3 sp, 3 dc in next ch-3 sp. (2 tr, ch 3, 2 tr) in next ch-3 sp, 3 dc in next ch-3 sp, 3 hdc in next ch-3 sp, 3 sc in next ch-3 sp, 3 dc in next ch-3 sp, 3 tr in next ch-3 sp, (2 tr, ch 3, 2 tr) in next ch-3 sp,  3 dc in next ch-3 sp, 3 sc in each of next 3 ch-3 sps, 3 dc in next ch-3 sp, (2 tr, ch 3, 2 tr) in next ch-3 sp, 3 tr in next ch-3 sp, 3 dc in next ch-3 sp, 3 sc in next ch-3 sp, 3 hdc in next ch-3 sp, 3 dc in next ch-3 sp,(2 tr, ch 3, 2 tr) in next ch-3, 3 dc in next ch-3 sp, 3 hdc in last ch-3 sp; join with slip st to first sc.

Rnd 8: Ch 3, dc in next st  and each st across to corner, 2 dc, ch 3, 2 dc in corner ch sp, dc in each st across to next corner, 2 dc, ch 3, 2 dc, in corner ch 3 sp, across to join with slip st to top of beg ch-3: end off white.

Rnd 9: Join Blue in any corner ch sp, ch 5, dc, skip next 2 dc, dc ch 2 dc in next st (v-st made). Skip 2 dc , make a V-st, skip 2 dc V-st across to next corner, in corner sp make a dc, ch-3, dc skip next 2 dc and V-st, continue around, join with a slip st to third ch of starting ch 5, finish off blue.

Rnd 10: Join Red in any ch 2 space, ch 3, 2 dc in same sp, 3 dc in each ch 2 sp across to corner sp, in corner sp 3 dc, ch 3, 3 dc continue around, join with slip st to beginning ch 3, finish off red.

Rnd 11: Join White in center of a dc of row 10, ch 5, dc in same sp, sk next 2 dc and V-stitch in center dc of last row to corner sp, in corner sp dc ch 3 dc then continue with the V-st in center dc of previous row. You should have 9 v-stitches on each side and 4 corners for a total of 40 V-stitches. Finish off white.

Rnd 12: Join Blue with a slip st in any dc, ch 3, *dc in each ch space and each dc across, in corner sp 2 dc, ch 3, 2 dc; rep from * around. Now before you cut off the yarn of this last round, I suggest you measure now for your 12"s. If  your over, then you can rip last row out and use either a sc or hdc around so it comes out to 12". If it isn't at 12," you can add a row of sc or add a row of hdc around to make it 12". Finish off and weave in ends.
Note:   I have one BIG tip for working on round 7. Please read this round one stitch at a time, do not try to repeat as they do not repeat, this is the round that makes the square shape take place and needs to be made as written one stitch at a time. Your square may look really ruffly by the time you get to round 9, but when you have added 10, 11, and 12 it will have shaped up. Just smooth it out with your hand and it does go flat and square.

http://www.ravelry.com/patterns/library/center-heart-square


Until We Meet Again
Claudia


"Y" not crochet!

Can you relate?


My family tells me that I first need to admit I have a problem. Maybe I do, right now, I am trying to get to a yarn shop so I can try dying the yarn myself. Crazy!


Until We Meet Again
Claudia


Wednesday, January 7, 2015

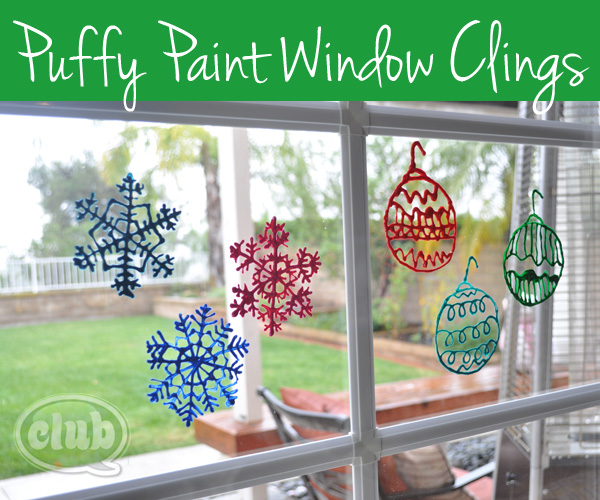
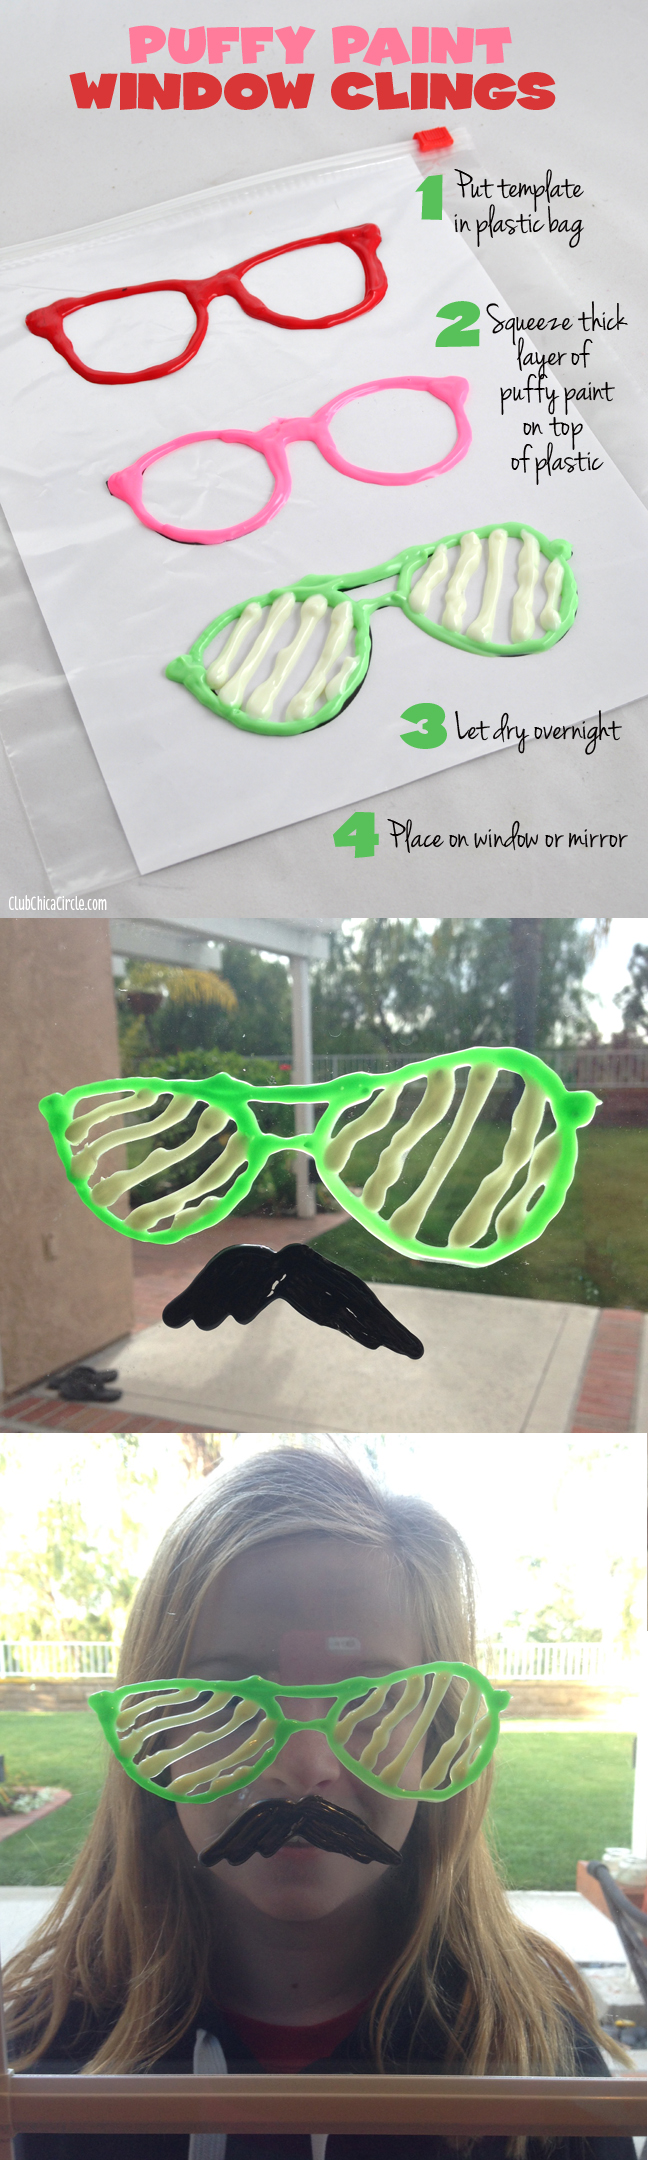
Window Cling Free Pattern

I want to thank Chica Circle and Pauline for this idea.
Since Christmas is over, I want to make clock faces for New Year's Eve and hearts for Valentines.
It is a great craft for me the Creative Challenge.

Follow this link for patterns that you can trace. http://club.chicacircle.com/wp-content/uploads/2012/12/Puffy-Paint-Window-Clings.jpg

All you really need is Puffy Paint, Wax Paper and a Coloring Book.

Why Coloring Book, they have the best and easiest patterns to trace. 
Now, that Christmas is over why not several snowman?

This is a great version that would be fun
 and also
 prevents someone from walking into your glass doors 


Cute and fun for the summer months!!

Just a thought!

Until We Meet Again
Claudia

Monday, December 22, 2014

Free Pattern for Infinity Scarf

I just love this stitch, it is easy and quick:


Here is my version


 I used a dark gray with black accents.


This scarf is all one color.


Use a lighter shade of the same color


Or this for Christmas scarf! The opportunities are endless with this stitch!

Directions:
Ch = chain, sl st = slip stitch, sc = single crochet, dc = double crochet (U.S.)
  1. Counting in 3’s, ch as many stitches as it takes to make a chain 60″ long (this pattern calls for original chain to be any multiple of 3 so just count “1-2-3, 1-2-3, 1-2-3…” as you make the chain and make sure that your last chain lands on chain number 3).  Check that the chain hasn’t twisted and join to the first stitch with a sl st so that it now forms a ring.
  2. Round 2: dc in every chain until you’re completed the round and join to the first dc with a sl st.
  3. Round 3: ch 3 and then sc between the 3rd and 4th dc, ch 3 and then sc in between the 6th and 7th dc.  You want to keep repeating this pattern every 3 double crochets until you’ve completed the round. Join with a sl st.
  4. Round 4: dc 3 into the chain you made in the previous round and then dc 3 into the next chain and continue in this manner until you’ve completed the round.  Join with a sl st.
  5. Repeat the pattern from Round 3 & 4 until the scarf is the desired width.
  6. Bind off and weave in the ends.


Until we meet again
Claudia
Related Posts Plugin for WordPress, Blogger...